The integration between EMP Trust and Lever allows for a seamless flow of data and information between the two platforms, enabling HR teams to manage the entire recruitment process from start to finish easily. This integration allows users to easily transition new hires from Lever directly into the EMP Trust platform with just one click, eliminating the need for manual data entry and simplifying the onboarding process for both US and global markets.
The EMP Trust team develops, maintains, and backs this custom integration. For further assistance or details on this integration, feel free to reach out to EMP Trust directly. Visit the EMP Trust website for additional information.
Setting up the EMP Trust integration
Initial Integration Procedures:
- You will share your Lever API key with EMP Trust via a Secure email/encrypted mail service.
- These are used as part of the Basic Authentication method to access and invoke all the required API calls.
- EMP Trust service/API will make use of the provided API key to authenticate entry into the Lever system and start the data sync.
- Once the authentication is successful, the service can initiate the data sync procedures by invoking the required APIs.
How does data sync work?
- A Basic Authentication method is used here before the service is invoked and data sync occurs between the EMP Trust & Lever systems.
- Lever must be set up and configured as a partner in EMP Trust.
- Apart from the API key, the client will have to provide EMP Trust with the stage_id and the date on which the data sync is supposed to start.
- If all the required data has been received, the scheduled service will initiate the data sync accordingly.
- The service will sync data once every 4 hours on a daily basis from Lever systems.
- If the authentication fails, the service will log and send the corresponding message.
Using the EMP Trust Lever Integration:
Data Mapping
| S.I No | Lever Field Name | EMP Trust Field Name | Description |
| 1. | id > OpportunityUId | ||
| 2. | contact > ContactUID | ||
| 3. | Opportunity > name |
|
denotes the name of the employee |
| 4. | denotes the email of the employee | ||
| 5. | job_posting | – | |
| 6. | job_title | Designation_Name | denotes the job title of the employee |
| 7. | Offer > candidate_name |
|
denotes the name of the employee |
| 8. | location / Name | Locationame | denotes the location of the new hire |
| 9. | anticipated_start_date |
|
denotes the date on which the new hire is supposed to join |
| 10. | direct_manager > hiringManagerUId | – | a unique id for the manager |
| 11. | custom_emp_job_type | Package_id (using the package code) | |
| 12. | name > hiring Manager name | HireMgr_Name | denotes the Hiring manager’s name |
| 13. | email > hiring Manager email | HiringManagerMail | denotes the Hiring manager’s mail address |
| 14. | id > documentId | – | denotes the unique document id as found in Lever |
| 15. | downloadUrl | Link | This is the link to download |
| 16. | ext > documentextension | FileType | denotes the document extension |
| 17. | name > documentName | Display_Name | denotes the name of the document |
| 18. | type > otherDocument | DocumentType | denotes the document type |
| 19. | id > documentId | – | denotes the unique document id as found in Lever |
| 20. | downloadUrl | Link | This is the link to download |
| 21. | ext > documentextension | FileType | denotes the document extension |
| 23. | name > documentName | Display_Name | denotes the name of the document |
| 24. | type > ResumeDocument | DocumentType | denotes the document type |
Viewing the synced data from Lever in EMP Trust
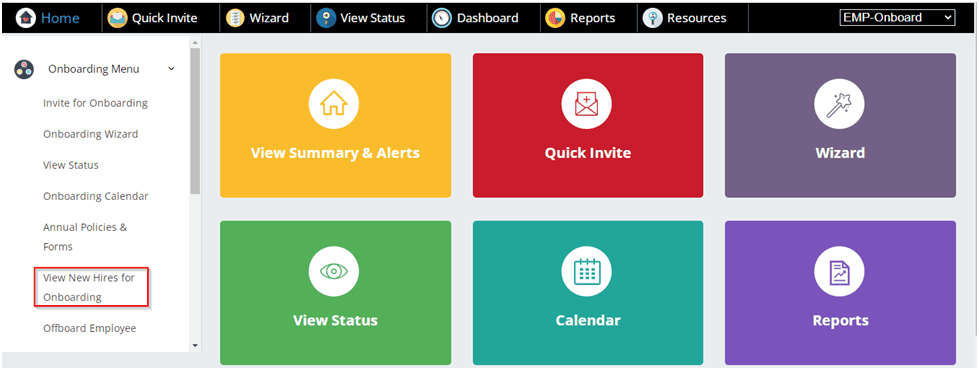
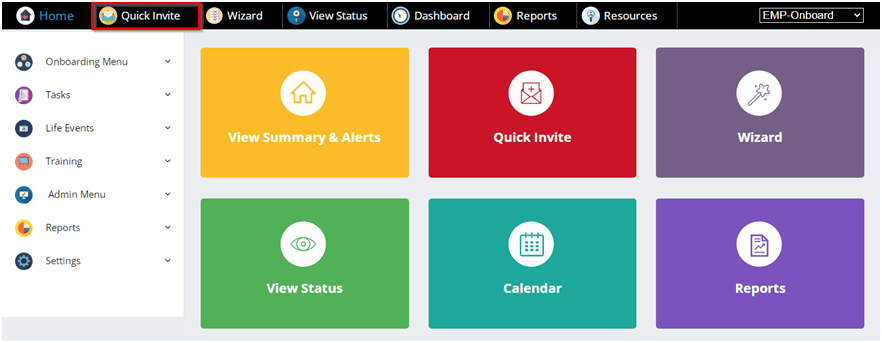
View New Hires for Onboarding
- The details of the new hires can be viewed and re-invited from the View New Hires for Onboarding page.
The steps to do the same are as follows: –
- Click on the “View New Hires for Onboarding” menu that comes under the Onboarding Menu.
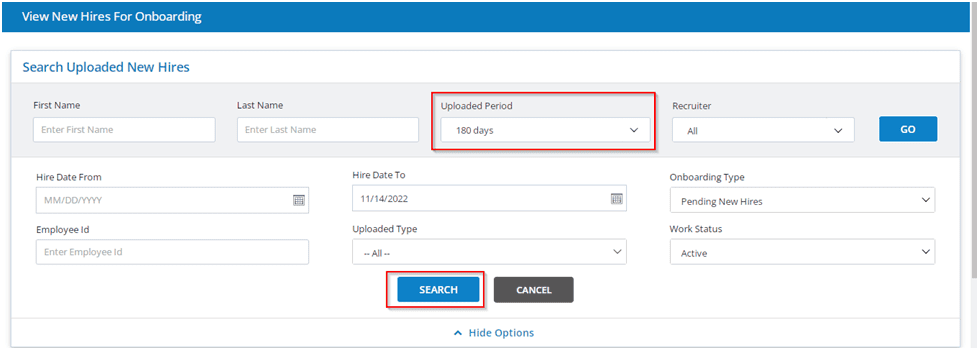
2. Select the appropriate “Uploaded period” and click on “Search”
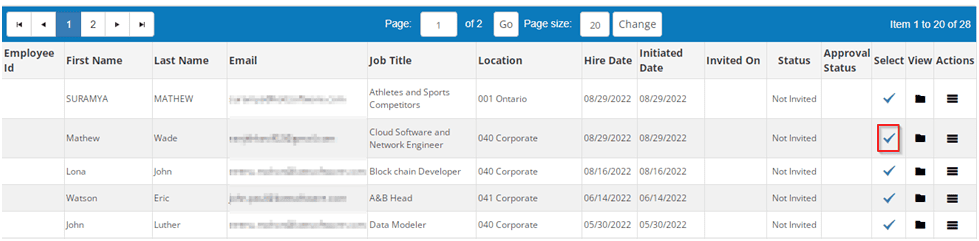
3. In the grid that displays, all the records invited from the given syncing period will be displayed. Click on “Select” against the corresponding new hire.
4. This would take you back to the Quick-Invite page. The data of the new hire would be auto populated, and you can click on “Invite” to send the invitation.
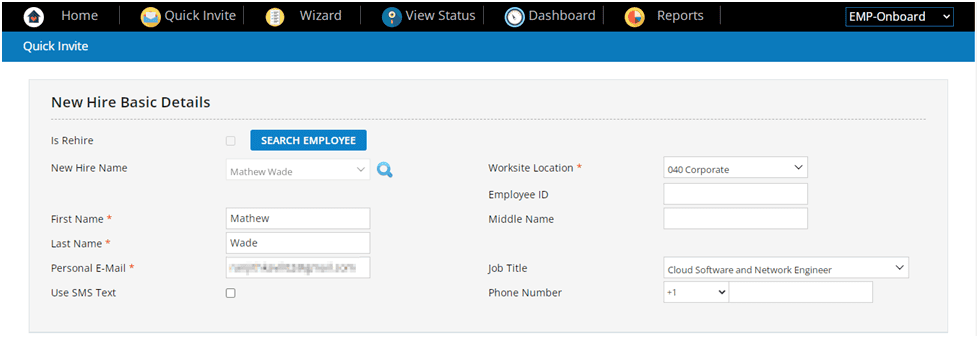
Quick-Invite Page
- The details of the new hires can be viewed and re-invited from the “Quick-Invite” page.
- The steps to do the same are as follows: –
- Click on “Quick-Invite” in the onboarding main menu
2. In the page, either enter the name of the new hire from the dropdown or click on the magnifying glass to search for the employee
3. Once the new hire is selected, the details of the employee will be auto populated in the respective fields.
4. Click on “Invite” to send the invitation again.
Note: –
- If an Automatic Onboarding invitation is enabled, the invites will be sent accordingly to the Start Date of the new hires.
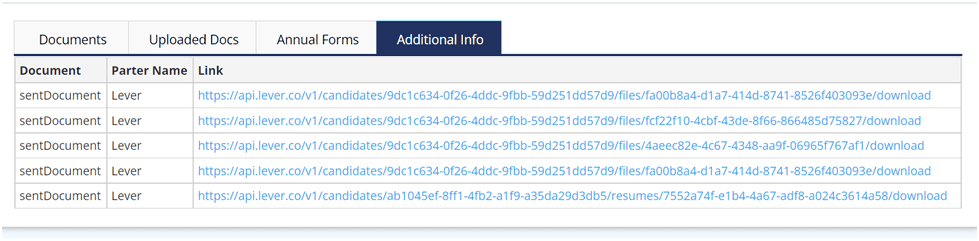
Document Center
- This integration offers links to download resumes & cover letters of those employee records that have been synced from Lever.
- In the document center of the corresponding employee, a link will be displayed, clicking on which the API call would be made to Lever.
- This would download the required document into the user’s system.
I-9 and E-Verify Workflows
I-9 process
- A client partnered with EMP Trust can be configured in such a way that their user representatives can send I-9 invites to new hires.
- Once the new hire receives their I-9 invite, they can complete Section 1 of their Form I-9.
- Once Section 1 of the new hire’s Form I-9 has been completed, the corresponding reviewer or remote agent can complete Section 2 of the same.
- These new hires can be found under the Search I-9 page or under the menu Complete Section 2.

E-Verify process
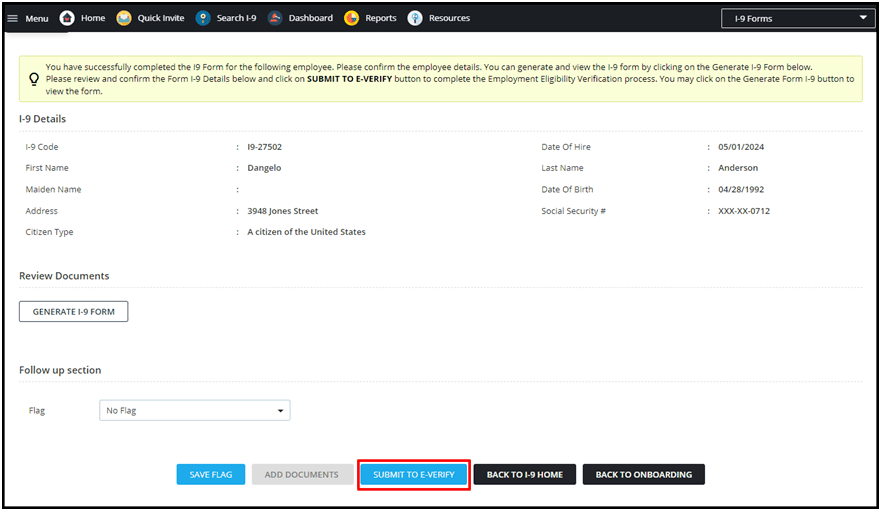
- Once Section 2 has been completed, the user representative can click on the Submit to E-Verify button.
- This would submit the completed I-9 record to E-Verify as a case.
- Once the case has been submitted, E-Verify would return the appropriate case status.